Showing posts with label freight house model. Show all posts

Monday, July 21, 2014

Shelf Rot

It's only been 18 months since my last update about/or any work done on the WP 3rd street freight house model. On a geologic time scale, I'm blazing along with blinding speed!

The time spent on the shelf of my cluttered office/man-cave/workshop has taken its toll on the model though. Specifically the delicate handrails on the stairs and deck that lead to the office doors. One wouldn't have needed to be Nostradamus (1503-1566) to predict that any such wear and tear would have worn and torn in that particular area. And since this model is intended for a module (a drop-in module at that) the decision to fabricate the handrails in ultra small diameter plastic rod was probably pure folly from the start.

So I've broken my R Street modeling fast by attending to rebuilding the handrails, this time in brass. My soldering skills are merely at the neophyte level, so it took me longer then most modelers to fiddle, tack and solder all the brass together and then bend it where needed and then clip and file away the excess solder till it looked half way decent. Still, it was a fun Sunday evening project to while away the hours until the final episode of the second season Endeavor came on Masterpiece.

I'm hoping it whetted my appetite for more modeling soon. And we can hope this will be 'soon' measured on more of a Julian calendar, something that measures mere weeks rather than epochs and eons.
It's a sad state of affairs... the plastic rod, it's not so strong. 
 
Laying things out. 


Tacked down and ready for solder... 


But maybe not _that_ much solder... 
Eventually it cleaned up somewhat. 

Sunday, January 13, 2013

Freight House: the handrails

Hello, everyone. Just a quick build update as I did manage to deal with the handrails on the freight house model over the weekend.

I certainly don't hold myself out to be a master modeler (and I'm sure you're seeing a multitude of sins in these very close up shots... click the picture to get really close in), but I rather like the way the handrails turned out. I built them up out of .025" Plastruct rod. For your amusement, I've included a number of in progress pictures.


I think I'll install those window A/C units next.

Wednesday, January 9, 2013

Freight Office Model Update

I may have mentioned somewhere that I am a really, really slow modeler. Even after I take into consideration the non-modeling demands on my time, I can only come to the conclusion that my progress on any given modeling project has to be measured on a geologic time scale.

Over the holidays I did manage to put in a few, ok, several hours on the freight office- and I'm still not done with the one wall I've been working on. So here is a picture in the midst of the sausage making .
My plan is to put as many of the details (including paint) while I can still work on the individual walls as separate pieces as  possible - I have other walls cut out and most of the windows installed by the way but I'm still a  long ways from assembling them together.

That said, I did get the foundation piece under the wall (not trimmed completely yet) and I've extended off to the left where the electrical conduit starts. 

The little bits attached to the walkway are the beginnings of  handrails. The steps going up to the walkway took a verrrry long time. I cut stringers from sheet plastic and then used strips to put the steps in and additional strips to fill in the backs of the steps (the rise). I probably could have built it up faster with sheet plastic. I'm not too worried about the little chip off the bottom of the walkway- there will be quite a bit of sculptamold paving on this side of the building when it is put in the drop in module.

Anyway... hopefully there will be another update on this project before the rurn of the next epoch.

Monday, October 15, 2012

Conductor Heads and Downspouts

As the in window air conditioners were obviously not original with the building it is not surprising that there is quite a bit of external electrical conduit on the freight office walls.  But before I can do any modeling of the electrical conduit I need to tackle the noodle at the bottom of the spaghetti: the downspout.

It still amazes me the things I learn on this project. I had to look up what the thingie was that is at the top of the downspout.  It's called a conductor head, or sometimes a leader head and it collects the rainwater, in this case from whatever drainage sloping on the otherwise flat roof, before going down the downspout.

My conductor head is just a shaped chunk of plastic square rod.  I say "just" but it took me several hours before was happy with what you see- or happy enough to stop. I'm not a sculptor, Jim! 

I even hollowed as much out of the top as I dare ---  Hopefully the top of conductor heads were open... I'm not sure if I've ever seen one from the top.  My conductor head is a little bit shorter and squater than the original but I still think it looks good. 

On the original downspout on the offices north wall it empties into a pipe with disappears in the elevated concrete walkway. I managed to find a piece of suitable pipe from my spares that, after a bit of sanding seemed to fit the bill. 

Saturday, October 13, 2012

WP Freight House Details: in window air conditioners

OK, so I'm jumping the gun a little. I'm still cutting plastic for walls and dealing with windows and here I am talking details.

Sorry. Can't help it. Like many of my fellow railroad modelers, I like detail parts.

From Bob Clark's pictures of the freight office in the 1970s in the previous post, we can see quite a few of those in window air conditioners - and evidence that there were more sometime in the past. Sacramento has always had a habit of being really hot in the summer and this was one way to beat it. I've seen earlier pictures of this freight office that showed they used a combination of 1st floor awnings and these little air conditioning units.


So I picked up  this set of BLMA photo-etched (I'm assuming) stainless steel air conditioners from one of the local train shops. They fold up quickly and easily and I think they look really sharp. In one of these pictures you'll see a cast metal air conditioner from my detail part collection of doo-dads that I thought looked good enough at one time... ah progress.

Wednesday, October 10, 2012

Freight House on the Drop In Module

The modular club I belong to (
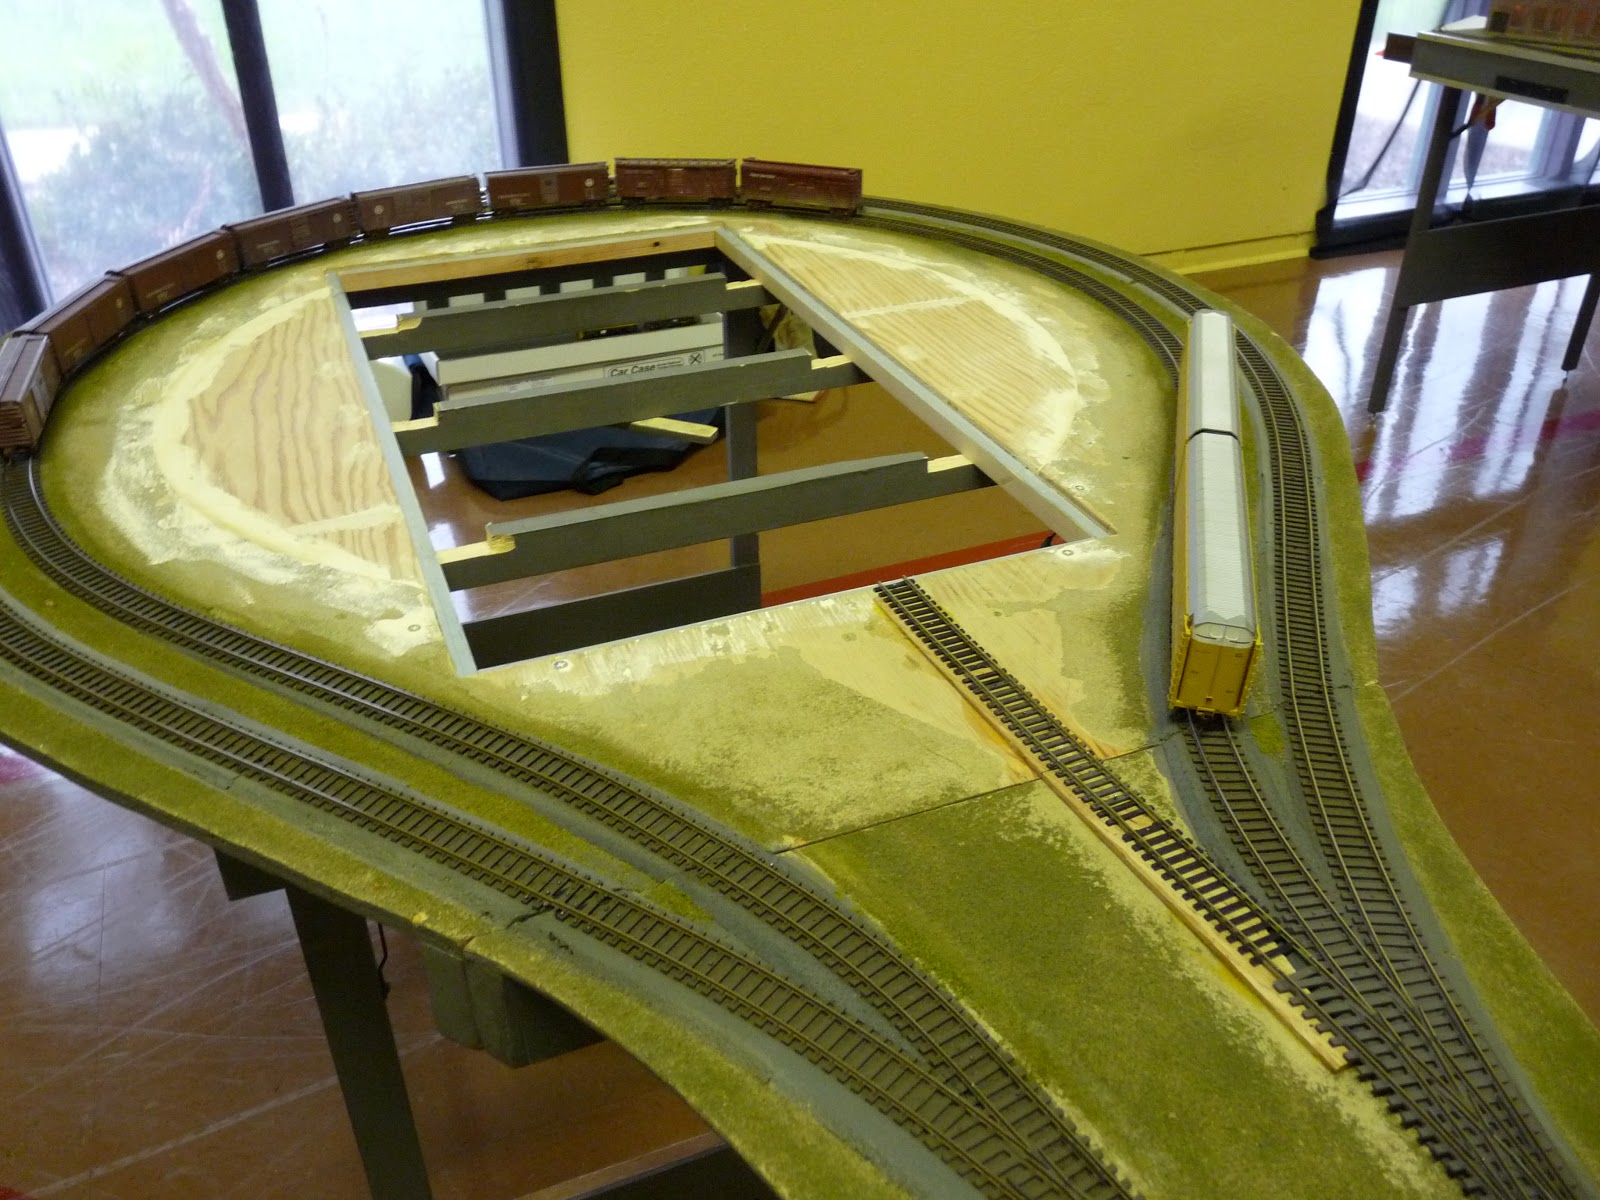
Sacramento Modular Railroaders) is developing a new module type. We're calling these new modules 'drop-ins'.  The club owns two turn loops that have had open centers since they were built several years ago. The idea of the drop-ins is to fill those holes and also to provide the opportunity to construct mini modules that provide additional switching possibilities for our ops sessions.

They will be smallish at 18" wide by 32" long - with a single track centered on line 7" from one edge.

I'm a big fan of this new module type. Their small size means it can fit in the trunk of my car and I can quickly jump to the thing I like most about model railroading - building buildings.  I'm  scratch-building a freight house for my drop-in and it is based closely on the WP freight house that used to be at 3rd and R streets. I've written about this freight house and it's sister at 2nd and R quite a while ago here.

Since that early blog post I've asked and been given permission from Bob Clark to display some of his great pictures he took back in the 1970s of the building. You should be able to double click on the pictures to enlargeify them.

3rd street - West elevation 

freight office north elevation - the truck side
freight office south elevation

further down the south elevation - 

4th street - east elevation. That's the logo of a freight forwarder.

If I did the building in it's entirety, it would measure out to something like 42".  I was not a math major, but I believe that is more inches than I have drop in module length.  So I'm condensing the building - and I'm doing that by only modeling three railroad loading doors instead of the prototype's five. It should still look like a worthy freight house though, and I should be able to just fit it in at just under 32".

So I began cutting plastic and modifying window castings. Here are the first two walls I've been working on.  Wish me luck and the strength to persevere!   
west elevation office wall

north elevation office wall